To create a login page in Mendix, follow these step-by-step instructions:
1. Create a new Mendix project: Open Mendix Studio or Mendix Studio Pro and create a new project. Give it a name and select an appropriate template or starting point.
2. Set up your domain model: Define the entities needed for the login functionality. Typically, you will need entities for User and Role. The User entity should have attributes like Username and Password.
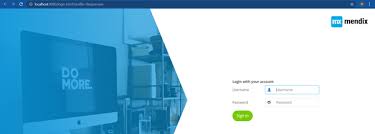
3. Design the login page: In the Mendix Studio or Mendix Studio Pro interface, navigate to the “Pages” section and create a new page. Name it “Login” or something similar. Use the interface designer to design the layout of the login page.
4. Add input fields: On the login page, add input fields for the username and password. You can use the “Input” widget from the toolbox. Configure each input field’s properties to match the corresponding attributes in the User entity.
5. Add a login button: Add a “Button” widget to the login page. Label it as “Login” or a similar label. This button will trigger the login action.
6. Set up a microflow for login: In the “Microflows” section, create a new microflow named “Login”. Double-click on the microflow to open the microflow editor.
7. Add a “Retrieve” activity: In the microflow editor, add a “Retrieve” activity to fetch the user record based on the entered username. Connect the input parameter of the Retrieve activity to the username input field.
8. Add an “Exclusive Split” activity: After the Retrieve activity, add an “Exclusive Split” activity. Connect the output path from the Retrieve activity to this Exclusive Split activity.
9. Add a decision to check password: In the Exclusive Split activity, add a decision to check if the entered password matches the password retrieved from the database. Use the appropriate condition and connect the true and false paths.
10. Add a “Show Message” activity: In both the true and false paths of the decision, add a “Show Message” activity to display an error message if the login is unsuccessful. Customize the error message based on your requirements.
11. Add a “Change Object” activity: In the true path of the decision (i.e., when the password matches), add a “Change Object” activity to update the User object’s attributes as needed. For example, you can set a Boolean attribute like “IsLoggedIn” to true.
12. Add a “Close Page” activity: After the “Change Object” activity, add a “Close Page” activity to close the login page and redirect the user to the main application page.
13. Set up navigation: In the navigation configuration, specify that the main application page should be displayed after the login page is closed.
14. Test the login functionality: Save your changes and test the login page by running your Mendix app. Enter valid and invalid login credentials to verify that the login functionality works as expected.
That’s it! You have created a basic login page in Mendix. You can further enhance the login functionality by adding features like password reset, user registration, or integration with an external identity provider.
Stay tuned for a detailed guide for creating basic mendix apps !!