
Let’s review what we know so far. We know about the different services offered by AWS. Then we looked in specifically ‘CAAS – compute as a service’ in AWS. For this purpose, we learned how to set up our own AWS virtual server using EC2. Now, we have the machine deployed and ready according to our software & hardware specifications. Now we need to work on how to run our web applications i.e set up our network on those machines using a VPC.
How do I create an AWS network? Which networking services are used in AWS? What are the types of storage in AWS? Let’s take this shot and answer all these questions.
AWS Networking – VPC
Networking in AWS revolves around the concept of VPC’s. Now, the question comes, what is VPC in networking? VPC stands for Virtual Private Cloud. As the name suggests ‘private’. A VPC isolates your application from millions of other applications that are running on AWS.
What do we achieve by isolating our application?
The idea is nothing comes in the box, nothing gets out of the box, without your specific permission. When you create a VPC, you also then divide the space inside the VPC into subnets. What is a subnet?
Subnets are primarily used to determine access to gateways. Didn’t get a word? No problem. Think of a subnet as a locker inside the VPC. We can have multiple such lockers to isolate data from each other within the VPC.
Still dot getting it? Relax. Think of a normal corporate setup where a company has 2 offices, one in Banglore & another in Mumbai. In Banglore, they have computers and storage in their office, similarly in Mumbai. Now They don’t want to share, for example, say data with each other, so they’ll put each storage in a different subnet inside the same VPC. I hope that makes you understand. If not, drop a comment & I’ll get back to you.
We can also say subnets are used to, well as to isolate specific traffic that you don’t want to talk to each other or do want to talk to each other.
How to create a VPC?
To build the VPC, you only have to declare two specific things: what Region you’re selecting, and remember we’ve already talked about the reasons why you might choose one Region over another, and then the IP range for the private IPs of everything that’s going to run inside this VPC.
- Click on VPC, and this opens up the VPC dashboard
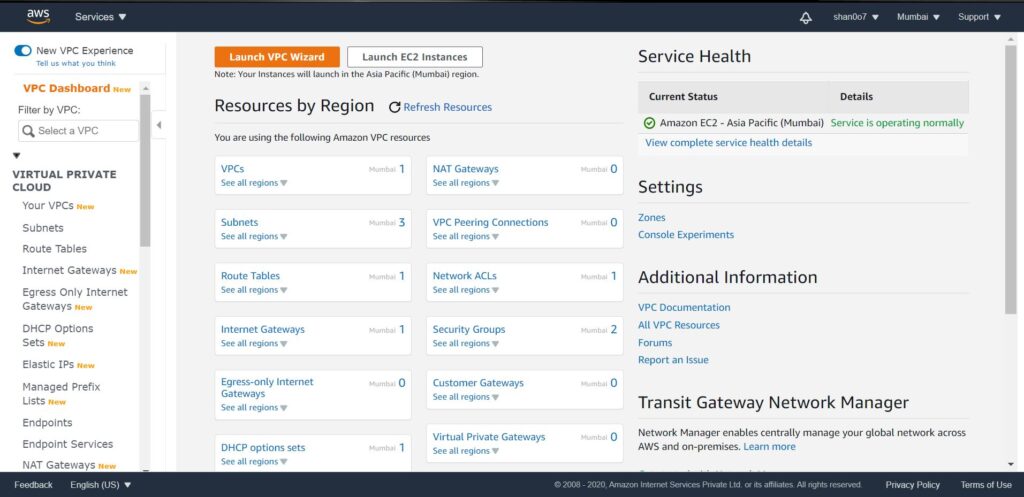
- Launch the VPC wizard (we want to create a VPC with a single public subnet).
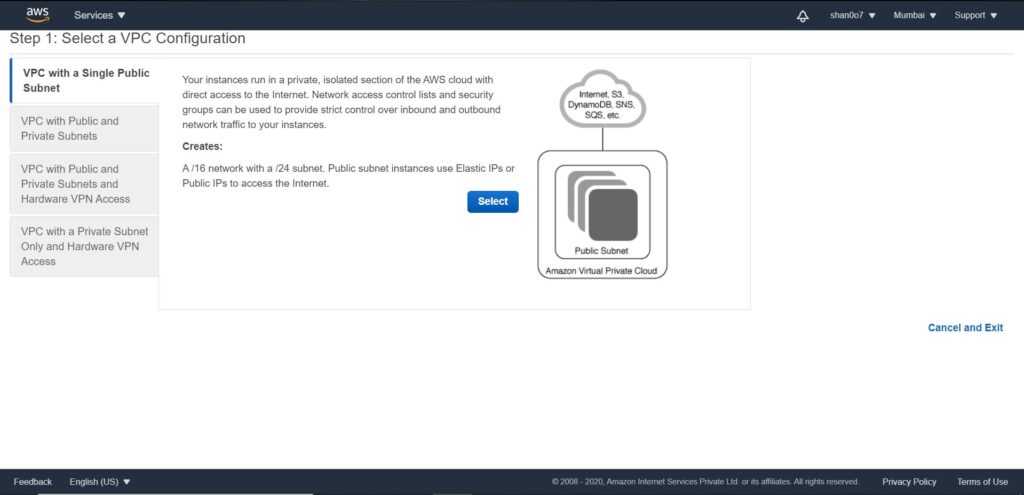
- Click select. Now we will have to fill the public subnet configuration. Define the CIDR block. Give it a name say DEMO.

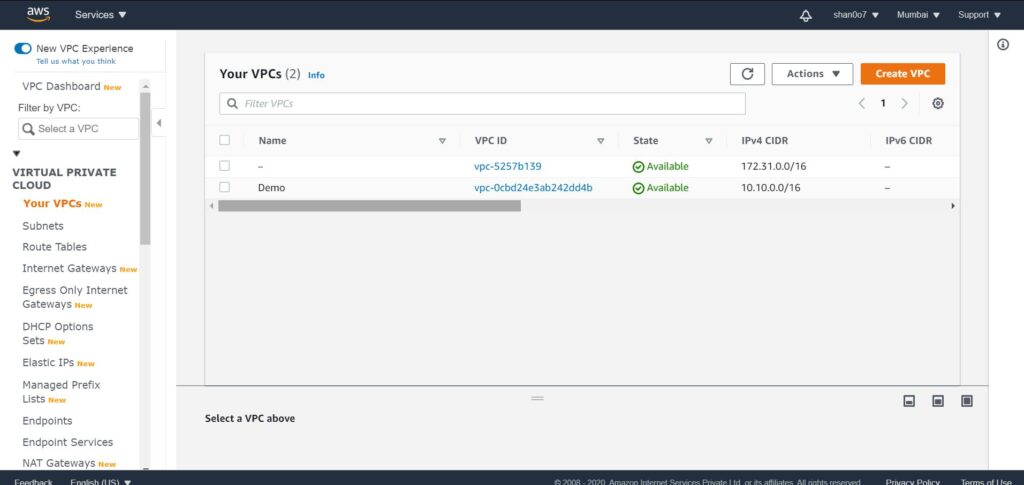
- Voila, VPC created.
But remember the VPC stops all traffic in and all traffic out, and if we’re going to put a web server in there, well, that means nobody can talk to it. So, we have to add a gateway, and the gateway is called the internet gateway, or the IGW, the internet gateway.
To allow our public subnet to accept traffic from the internet. We’re going to create a route table, and then we’re going to associate that route table with our public subnet.
- Select Internet Gateways on the VPC dashboard & click create internet gateway.
- Name it to demo for now. And we are done.
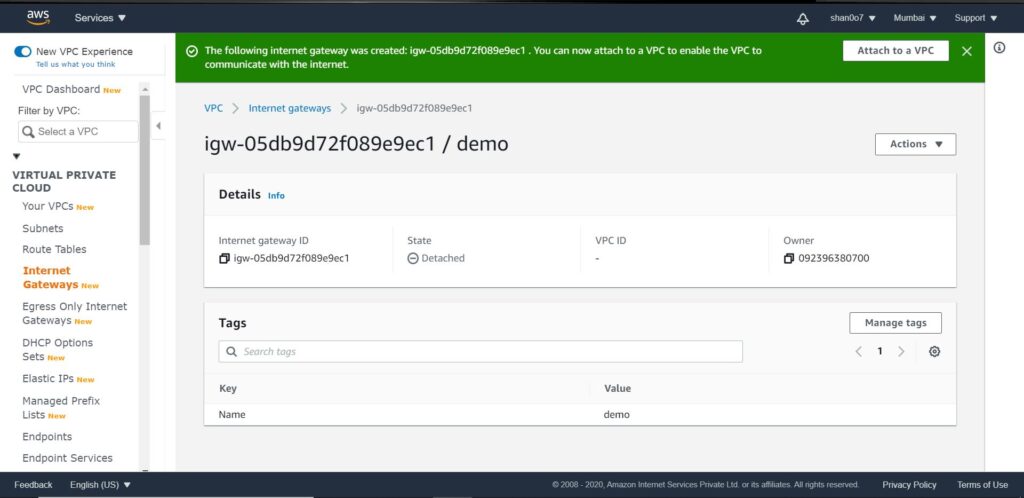
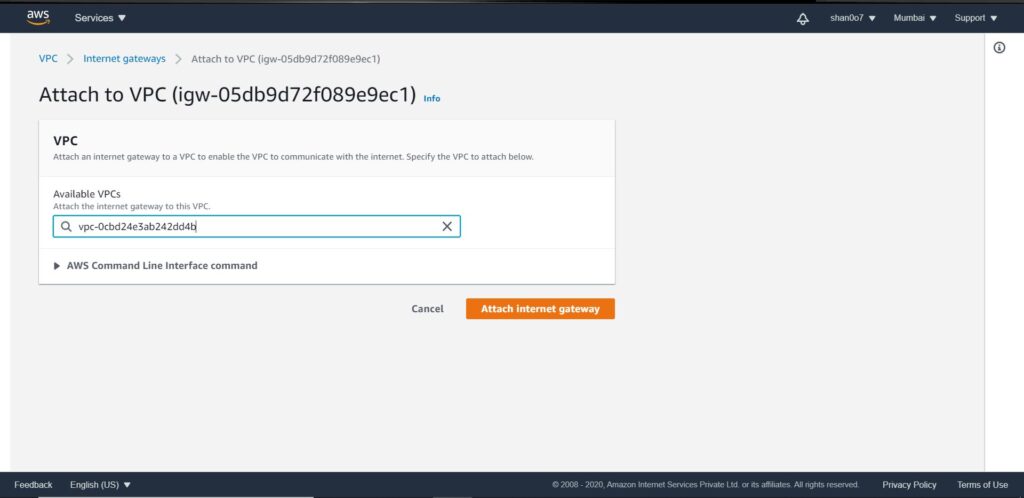
- As you can see in the above image, it says State- detached.
- We have to attach our IGW to our demo VPC
Route table – attach it to the VPC
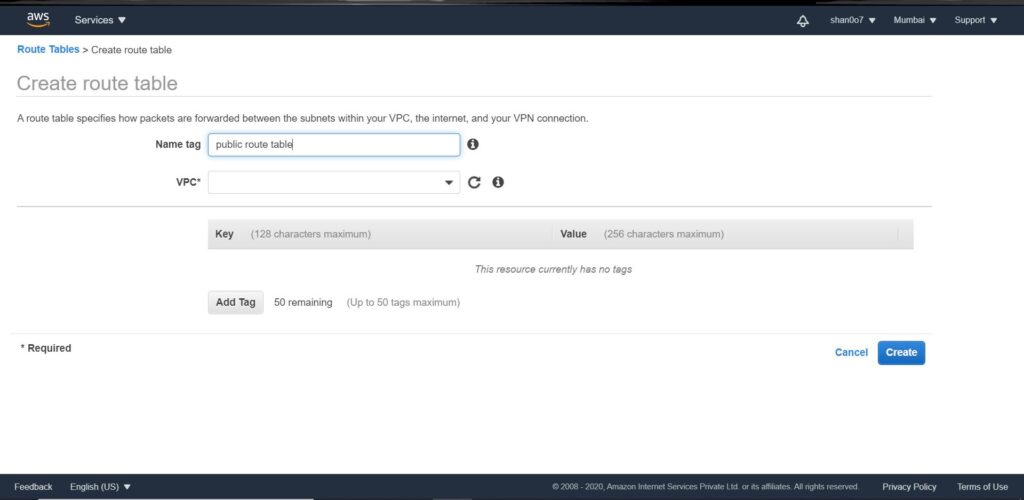
What we need to do next is create a route table that allows that internet traffic to be routed to our public subnet. So, I’ll go to the left and click Route Tables. From here, I will create a new route table. We’ll give our route table a name, Public Route Table, and then we’ll select our DEMO VPC, and then we’ll click Create.
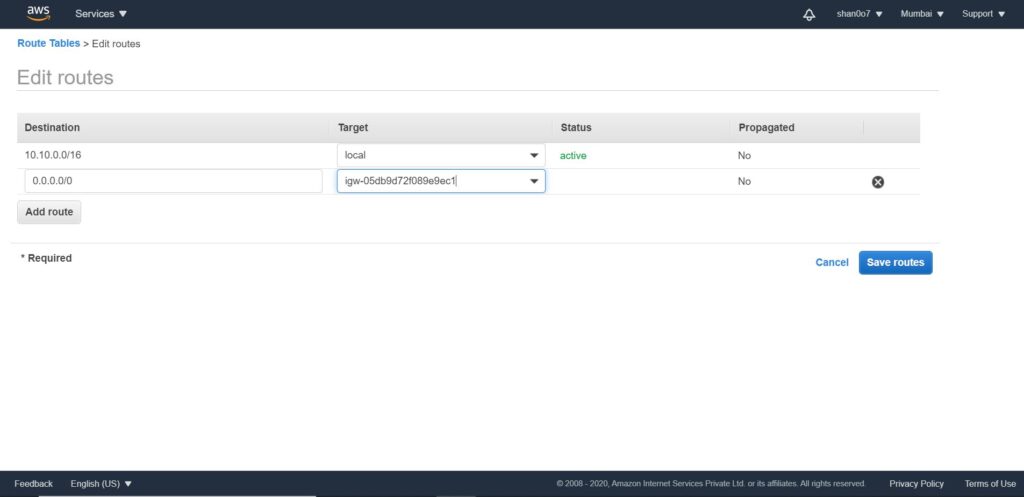
Now, we need to edit our route table to allow traffic from the internet. To do that click edit under the Routes tab.
Attach the public subnet we created in the previous steps in the route table. Click edit under the subnet associations tab and you’ll know what to do.
Now we have a VPC, a subnet, and IGW associated with that subnet. All we now need to do is create an EC2 instance and Add our VPC, IGW & subnet to its configurations.
Let’s recap what we did so far. We created our own EC2 instance inside a subnet which is attached to an IGW which we created inside our own created VPC. In simple words, you got the front end of your web application sort of up & running. Now, we need to move to the database plane.
Storage & Databases
But a database does not go, shouldn’t go, in the same public access subnet where my web servers are, because I never want anyone from the outside, at least, in my business case, to access a database directly. So, we’re going to make another subnet inside my VPC. But this subnet will not have access to the IGW. So this subnet is what we call a private subnet.
- On the left sidebar click subnets. Then click create subnet.
- Provide it with a name tag say ‘private subnet’ and attach our DEMO VPC to it. Then provide the CIDR block configuration. for eg 10.10.2.0/24.
- Select create. That’s it.
Inside the DEMO VPC, we have a public subnet for our app and a private subnet for the database. However, this private subnet is not attached to the IGW like the public one. So it can only be accessed within the VPC by the public subnet.
Multi AZ Strategy
By definition, a VPC is already a Multi-AZ structure.
Remember, in the previous shot I told you that we need to run our application on multiple availability zones, simultaneously. Here’s how to do that. We’ll create two new subnets in a separate AZ. One public subnet 2 with CIDR say 10.10.3.0/24 and one private subnet 2 with CIDR say 10.10.4.0/24. Don’t forget, while creating these subnets attach DEMO VPC and select a different AZ in configurations.
Now, Simply associate the new public subnet with the route table we previously created. We need to create an EC2 instance on our new public subnet as well, with Multi-AZ RDS deployment. I’ll talk about that later. Don’t worry about that now.
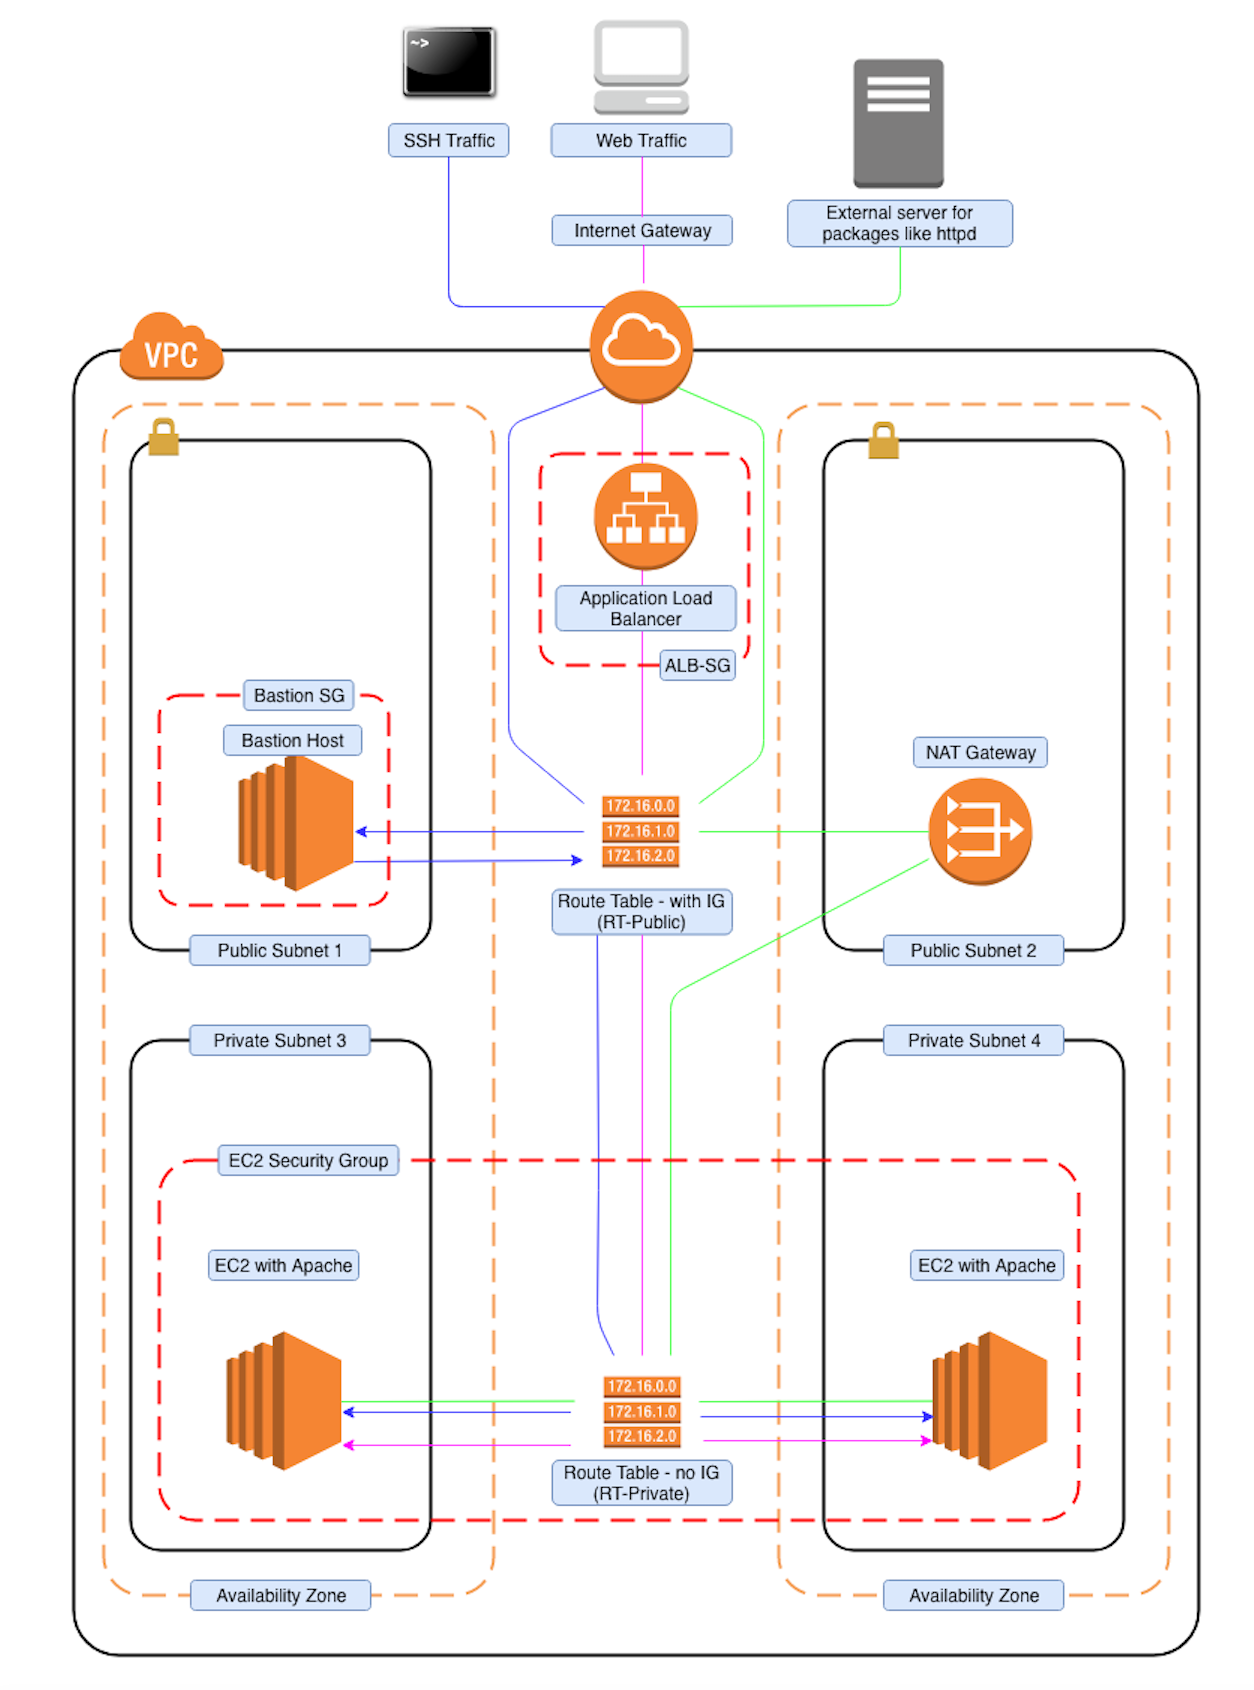
What do we have here? The diagram below will make it easier for you to understand.
AZ 1 – Public subnet : 10.10.1.0/24 & Private subnet : 10.10.2.0/24
AZ 2 – Public subnet 2 : 10.10.3.0/24 & Private subnet 2 : 10.10.4.0/24
What is an ELB? How to connect it to a VPC?
Now, from the diagram, it is visible that, we can either connect to this public IP(10.10.1.0/24) or this public IP(10.10.3.0/24). But do you really want your customers to have to choose which EC2 instance they log into? Of course not. That’s what load balancers are for.
What does an ELB do?
We launch an ELB and associate it with both of the EC2 instances so that it doesn’t matter which one gets the traffic. They’re both going to get an even amount of traffic distributed automatically by the elastic load balancer.
For more details on ELB, check out Getting started with ELB.
Concluding – VPC
We’ve got all the pieces you need to run a successful web application. You’ve got your VPC, the virtual private cloud. That is going to isolate your traffic from anyone else inside AWS. You’ve got traffic coming in from the public IGW that is going to go through the elastic load balancer and be distributed to either one of the EC2 instances. The instances are going to all talk to the database. The master database has a standby database in the event that something goes wrong.
Next Shot
We’ll go through different types of storage offered by AWS and their respective pros & cons.
See ya!