Before starting, just know that all we are doing in this shot is to set up our system for developing apps using Flutter. You won’t understand all the terms I use and will get doubts. Don’t worry about all that. You’ll understand each of these terms as our course moves along in the coming shots. What is Flutter, and how is it different?
Is flutter better than native? In my opinion, yes. The biggest advantage that Flutter gives in comparison to native Android is the cross-platform support, i.e., you can use the same codebase for different platforms like Android, iOS, Web, Desktop, etc. Being Flutter app developers, you need to just remember this — Flutter was built to work for any device with a screen :
- iOS and Android
- Web and Desktop (Mac, Windows, and Ubuntu)
Now, if you wanna be an android developer you go for Kotlin/Java, in the case of mac developers you need to learn Swift. I say, instead of wasting time learning two different languages, why not learn a single one that works on both. That is where Flutter comes in. The language I’m talking about is known as DART. We are gonna learn to code in this particular language. It is easy to learn and fun at the same time.
The common question you’ll get now is, should I learn Dart before flutter? No, you need not. We will learn both as we go along.
Setting up
How do I start?
Minimum requirements – Windows 7+, 10 gb+ memory, GIT. We can work in any editor like the android studio or visual studio. Here in this course, we’ll go with Android studio as it is far simpler.
Step 1 – Install GIT. Get GIT here. Download the exe file and run it. You’ll be taken to an installation wizard. Just keep clicking next until finished. Let the settings be the default.
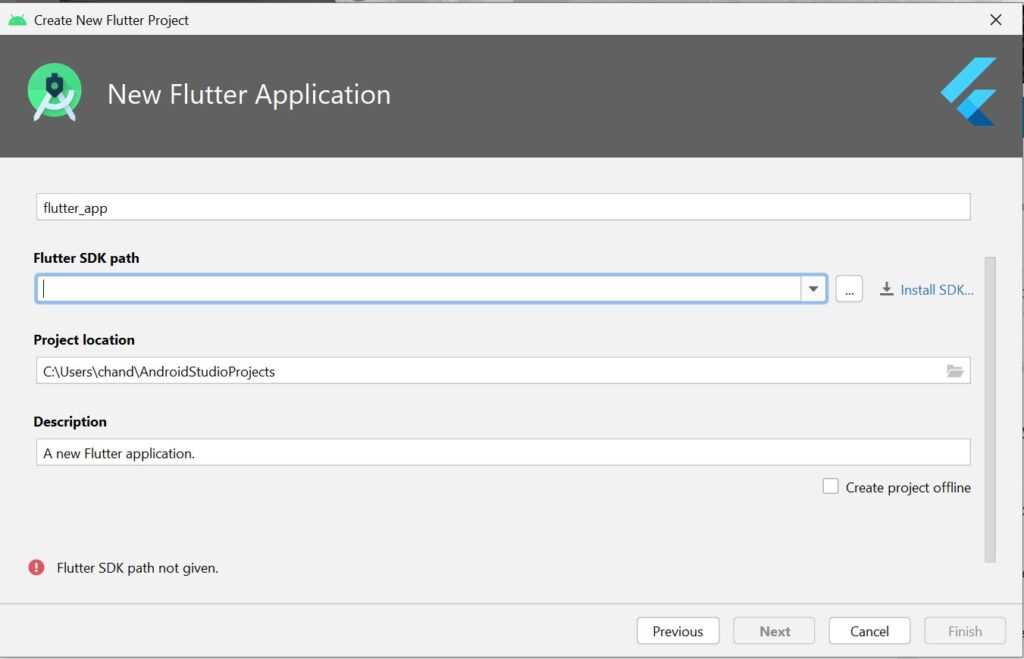
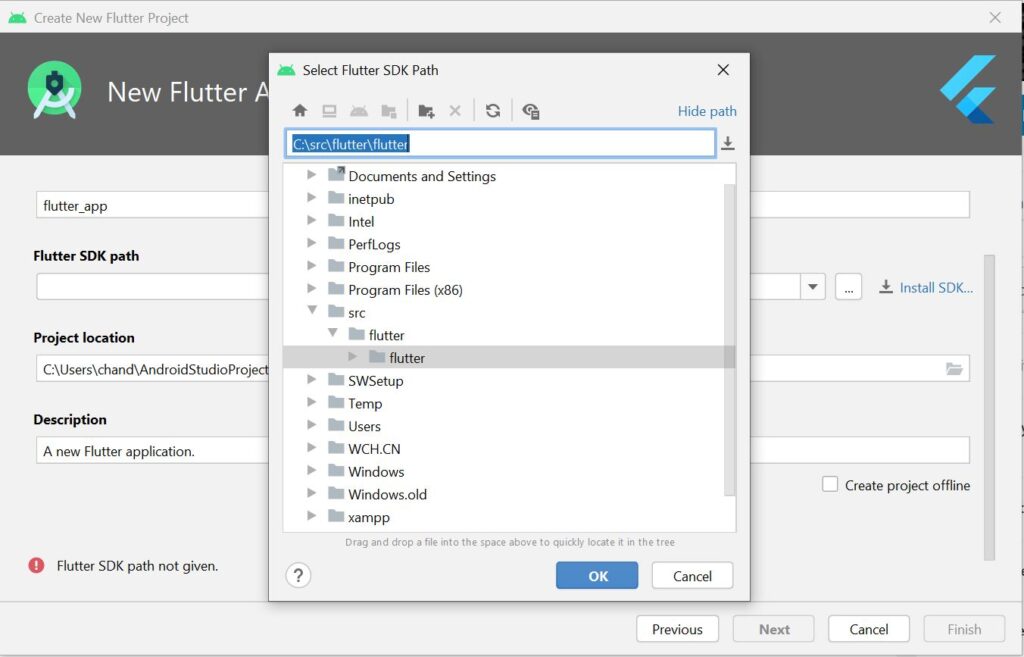
Step 2 – Install the Flutter SDK. Get it here. You’ll get a compressed file. Right-click on it and select Extract files…. Extract it to C:\src\flutter.
You are thinking what is an SDK? SDK stands for Software Development Kit. If you are a carpenter, you need a toolkit to do your work. Similarly, if you want to make software you need a particular SDK. In this case, it is the Flutter SDK.

Wait for a few minutes for the extraction process to complete. Now you can see for yourself. In C drive you’ll have a folder named ‘src’, inside it, there’ll be a folder ‘flutter’ => ‘flutter’. So you have finally installed Flutter SDK.
Step 3 – Add Flutter to your environment variables. How? Let’s see. This is done so as to access Flutter from any part of the system. Didn’t understand? Don’t fret. Let it be for now. You’ll get it eventually.
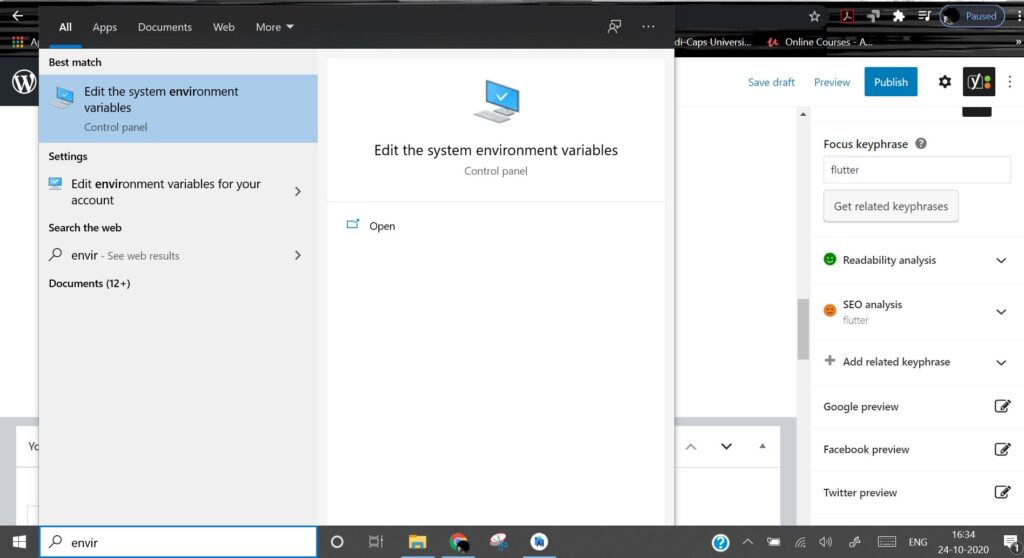
- Search for ‘edit the system environment variable‘ and press enter.
- You’ll be taken to a screen like this
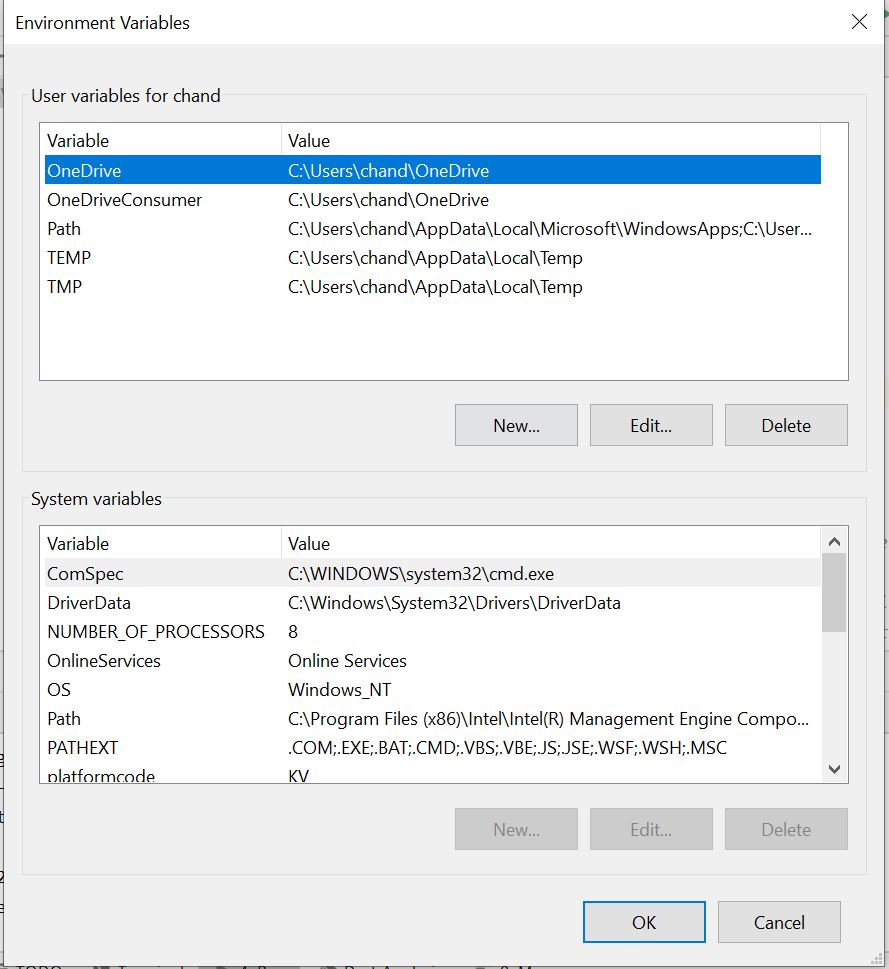
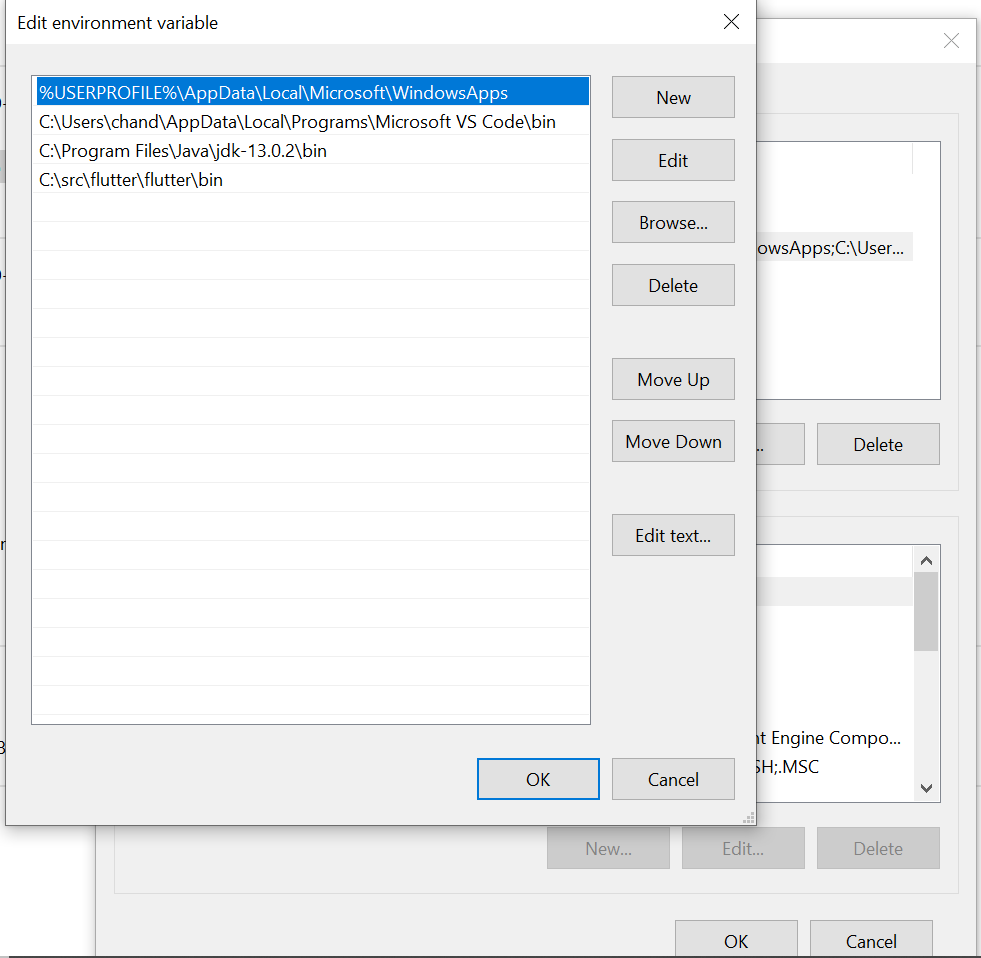
- Under user variables, click on ‘Path’ and select Edit…..
- Then select New and enter ‘C:\src\flutter\flutter\bin‘.
- Click OK
Android Studio – flutter plugin
Step 4 – Now, we need an editor to write our code on. To download and install the android studio on our device. Go to Download Android Studio.
- Then click on the exe file and you’ll be taken to the android studio installation wizard.
- Check the boxes (1)Android Studio (2)Android Virtual Devices.
- Let all settings be the default and keep clicking next until finished.
Step 5 – Now, we need to add Flutter and Dart plugins to our Android Studio.
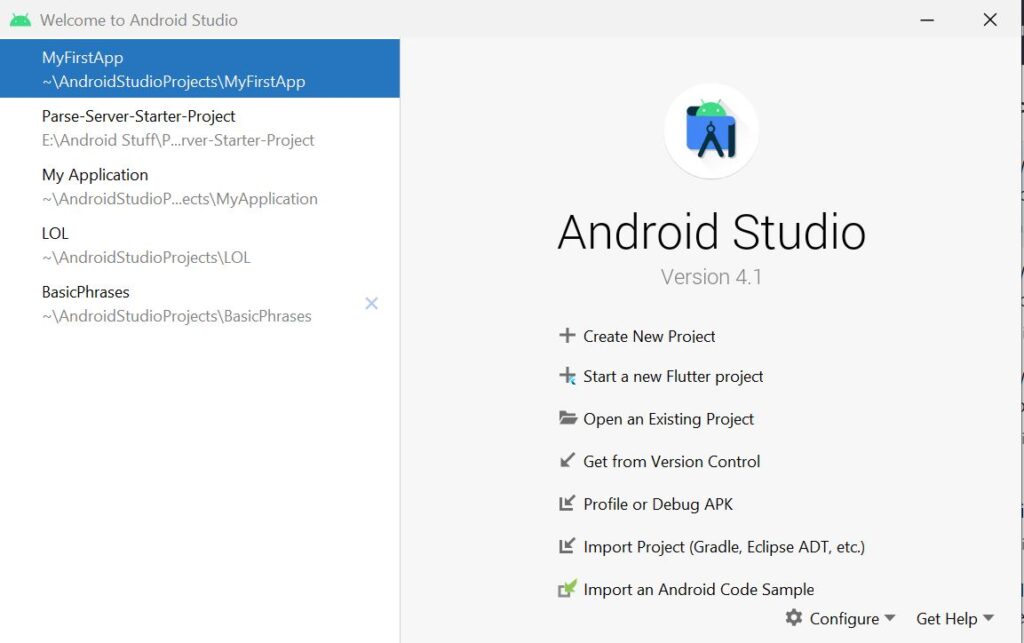
- Open Android studio. You will see a welcome screen.

- Select Configure in the bottom right.
- Open ‘Plugins’.
- Search for ‘Flutter’ and install. This will automatically install ‘Dart’ along with Flutter.

- Now your welcome screen will look something like this.
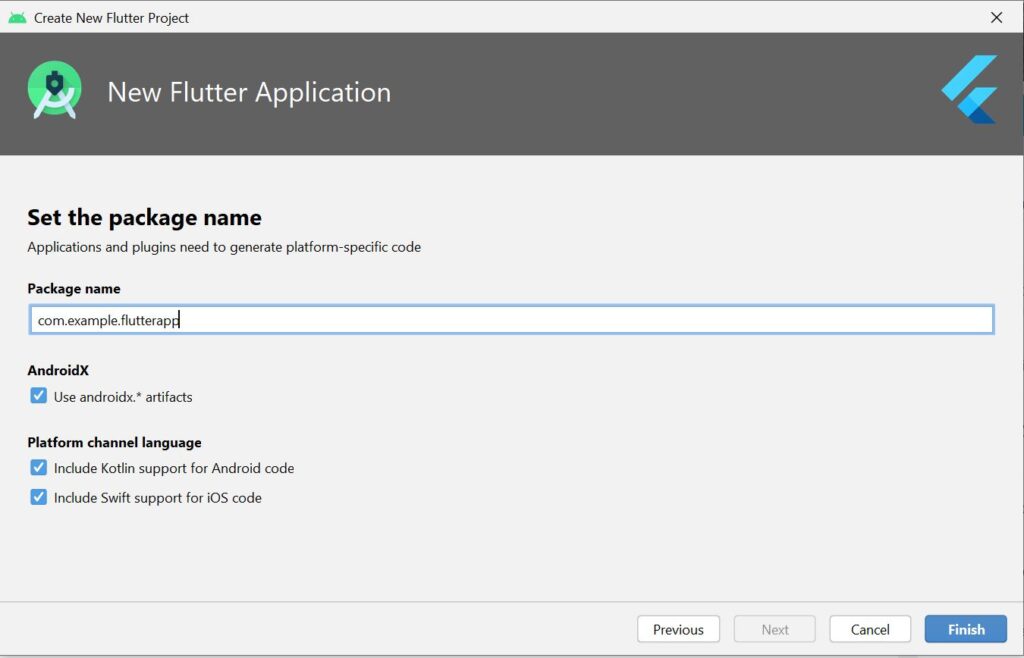
- Let’s start our new Flutter project.

- Wait for a minute or 2. The whole project is being set up.
Android Virtual Device Setup – flutter
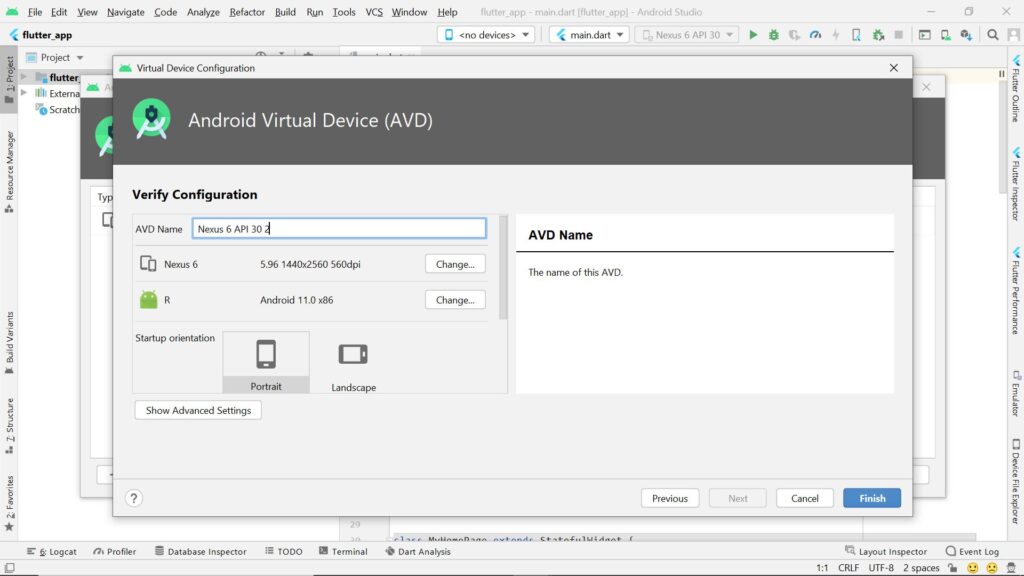
Step 6 – All left to do now is to make our own Android virtual device.
- Under the Tools tab, select AVD manager.

- Click on ‘Create virtual device’.

- Let’s go with Nexus 6 for now. Click next and next, then Finish.

So far we have done pretty much everything we need to start for our app making. Downloaded Flutter. Downloaded and installed GIT & Android Studio. Set up the Android Emulator(AVD).

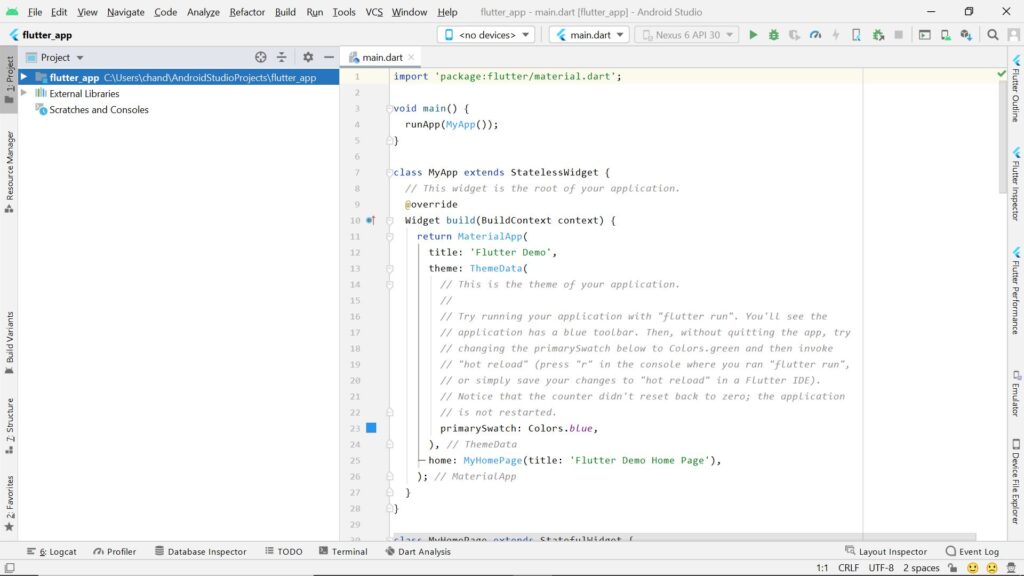
We now have, in hand, a project named flutter_app in which we have our own android emulator and a main.dart file. Run the project using the simple green play button on the top right. It’ll launch the Android emulator. Since it’s the first time launching, give it 5 or 6 mins. Then you’ll be able to see the demo application that comes with the main.dart file.
Note
You might encounter different kinds of error while setting up Flutter or the Android Studio. In such a case, just drop a comment and I’ll get back to you with a quick solution.
We have completed all the steps required to start developing apps. Once again, if you are still wondering what the few technical terms mentioned above mean or if you are still in doubt about what did you do actually. Don’t worry. As we go through the next shots you’ll learn to operate everything gradually.